Saturday 28 November 2015

NEW LESSON JUST ANNOUNCED!!


NEW LOWESTOFT LESSON! 

***Very limited spaces***


Taking place on Saturday 19th December 2:00 onwards - estimated 2-1/2 hours for completion 


Only £20 everything you need is supplied for you! (Including the candle!) 


What an ideal gift for Christmas for loved one! 

Or just a decoration for the home :) 


You can choose to do it exactly the same as mine, or you can pop in anytime up until 72 hours before the lesson and choose your own papers and colours, this will allow us time to have all the required elements die cut for you in advance :) 


Wanna get in first? 

***BOOKINGS BEING TAKEN UNTIL 8pm THIS EVENING!***

Call 01502 218281 

(Then booking will be taken during store hours)


Once again we will highlight we only have a limited amount of spaces :) 


(This is should for decoration purposes, you can not burn the candle in the lantern, but at a later date could get an electric candle instead :) ) 


Wednesday 25 November 2015

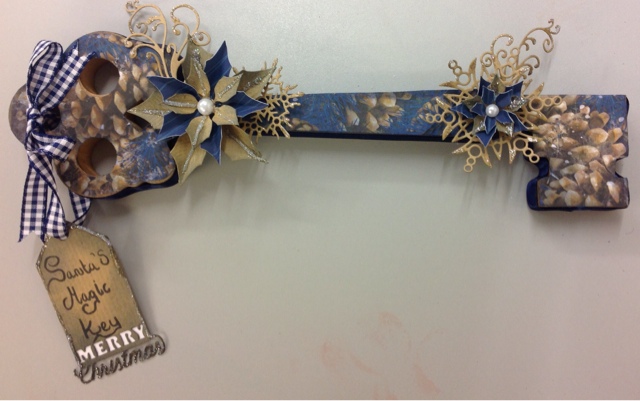
Santa's Magic Key


So for today's design team project I'm once again working with the wonderful Bo Bunny Sleigh Ride collection... 
So let's get one with the instructions...
First of all, I got myself one of these stunning Kaisercraft wooden keys, only £2.29 @ Craftmania! 
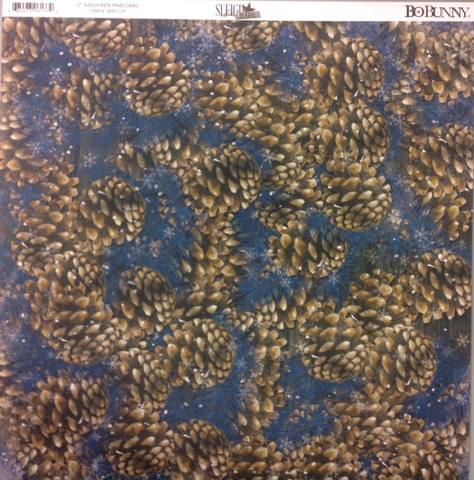
And used it to draw around on the reverse of my Bo Bunny Sleigh Ride sheet - 
Once drawn around, I simply cut 2 out (1 for each side) 
And then glued them on... 
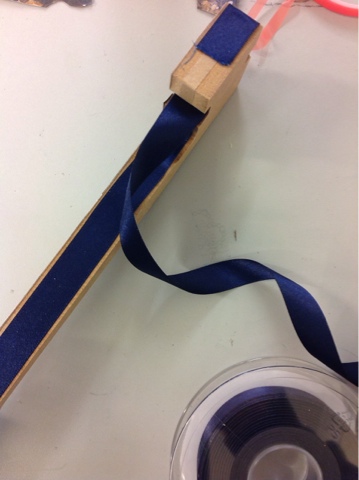
Now the width of the key... I didn't want to paint the base of the key, and felt the wooden essence of the key would be a shame to cover completely, but didn't want as much as if I just left it.. So ribbon was the answer, a quick and easy way to get in to all the nooks and crannys of the key without hours of faffing, so I just wrapped double sided tape around the key, and then placed ribbon on top... 
Now at this stage I decided the edges of my paper looked a little too freshly cut, and the white was bugging me, so decided to do what I should have done before sticking them on... Distress the edges! 
Chipped sapphire seemed the best idea! 
Now the base of the project was complete it seemed time to add on some of our FANTATSIC dies we get from Craftmania -(thanks to Jones Crafts!) 

The dies are all currently available from Crafttmania 
Large pointsettia - £23.49
Small pointsettia - £10.99
Trio of tags - £23.49
Snowflakes - £20.99
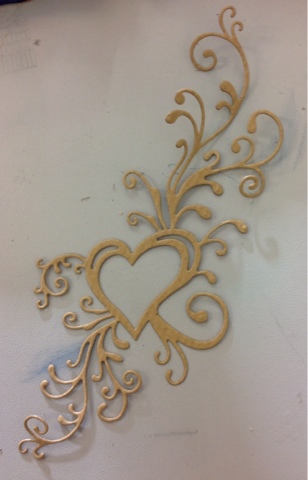
Heart swirl -£17.49

I cut all of this sheet from Kraft card and then again from sleigh ride - Tranquil 
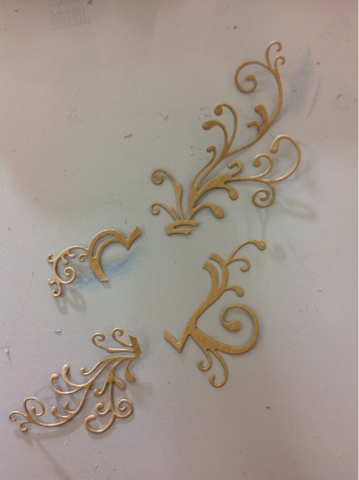
Then layered them as I felt best, adding glitter glue to the poinsettias and swirls, now the swirls are a neat trick... I love this die as it is... But with a few snips it makes a great value swirl die! 
 
Then all I did was glue gun on all of my die cuts and write on my Christmas tag, I also glued a piece of white card to the back of the "Merry" on my tag so it hopefully 'pops' a little more and added a couple of pearls... Job done! A nice easy Christmas decoration you could bring out year after year! 

All of the products used today are currently available at Craftmania - Great Yarmouth Norfolk Or lowestoft Suffolk, to order please call 01502 218281 

All of the products used today (with the exception of the distress inks) are available to the trade Via Jones Crafts. 

Tuesday 17 November 2015

Jones Craft Design Team project - Sleigh ride


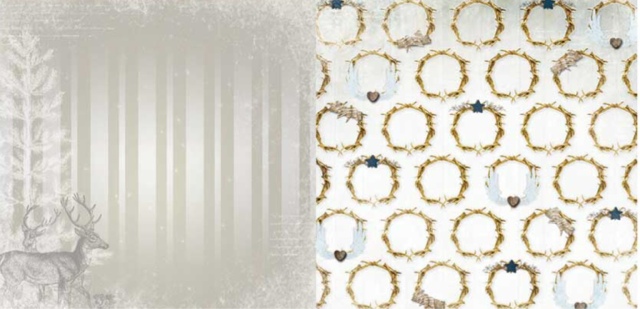
So today's design team project is made using the Bo Bunny Sleigh Ride collection, a wonderful winter collection! Well worth a look! 

For this project I've kept it rather simple and focused on adding a little more to the pages themselves.. Starting off with this page.. 
I've cut it down to 8x8 favouring the side with the reindeers... I've then taken my memento Potters clay ink and squeezed some out on to a tile and spritzed it with water to create my own watercolour that I've then used to paint the reindeer, I love this technique as it gives inks pads another use and saves you some pennies on buying paints and inks (means you've got more to spend in shiny papers ;) ) 

I've then distressed around the edges of the page with the same Potters clay to tone in the colours. 
For my final addition to this page I've used one of my favourite new stamp sets from Kaisercraft - 
And stamped this with the same Potters clay ink. 
Add photograph and then we move on to the back page! 

Once I had mounted my top sheet I used a quickie glue pen and iridescent glitter to the top of each snowflake, just to give the sheet a more expensive luxury feel. 

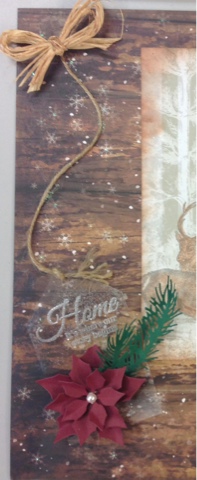
On to the tag! All this is a little block of acetate that I've punch and cut to create a tag, using a second stamp from the above set I've heat embossed it on the acetate with silver glitter embossing powder and added an adorable set of poinsettia dies from io and matching fern die, I've even sprinkled a little embossing powder over the tag to give a little more of a glitter feel to it. Attached string and glue gunned in a wave up the page to the raffia bow at the top (glue gunned on) 

I hope all of this makes sense, any questions please don't hesitate to ask me in the comments :) 

All of today's dies, stamps and papers are available at Craftmania 

If you wish to stock these products please call Jones crafts 

This page will feature as an upcoming lesson at both Craftmania Lowestoft (Suffolk) & Craftmania Great Yarmouth (Norfolk) check out - www.facebook.com/craftmaniacrafts/events for more details 


Sunday 4 October 2015

Sunday 13 September 2015

Design Team - Around the world in 80 days!


So for this month the wonderful people at Jones Crafts have given me the mission of using the new fab Scraps collections for my design team projects! 
Now in truth this is no real mission at all! The designs are so wonderful to work with it's a pleasure! 

So to start with... I've taken a sheet of dark cream 12x12 card stock...now this bit is completely optional.. But I wanted to be a little more frugal for this project so I've "gutted" my cardstock so I've got it to use for my layering a little later... So all I've done is drawn a border with a ruler just 1-1/2" in around all 4 sides and using my metal edged ruler and a knife I've cut out the centre.

Now for the fun part... Decorating our border!
Ok so confession time... At this stage you can see just how messy my table is! 
I've had a LONG day creating for my design team projects and upcoming lessons and the table has seen more than a few inky projects today! 

So back to it... As you can see I've distressed around the edge of my border with memento Potters clay ink, then using a Kaisercraft clear stamp - postmarks I've stamped randomly, overlapping in places, all over my border! 

For the next level I've cut down my sheet of. - British stripe c73 006 to a  10" square and stuck it over the top of my border.

Now for the next level of decorations I've taken 3 sheets - 
Paris c73 001
Britain c73 005
America c73 007 
Then cut a 2 inch vertical strip from each one.. Then cut the base of the strip in to a inverted v 
Next up, I've distressed around all pieces with memento Potters clay. 

I've then staggered my 3 strips overlapping them and gluing them over the top of my page. 

Now on to the cords... So all the way down the right hand side of the page I've glued on a twisted twine cord. After this I've used a thin twine and pierced my page 4 times at the top of the border and then wrapped the cord around the base and back through the holes, gluing them down on the back, I've also done this just once on the top left side of the page to continue the theme. 

Now for the photo matt, I've cut down part of the middle from the piece we "gutted" earlier. 
And distressed around the edges with the same memento Potters clay, then for some little extra stamping! 

I've used one of my favourite Kaisercraft stamps - Morocco to stamp all over the piece, it's so easy to line up for endless backgrounds! And at only £3.99 it's a cracking stamp! 

Ok for the next little bit.. Recently I've treated myself to one if the fantastic Little B punches (£29.99) ticket strip 


Cut from a lovely thick 300gsm cardstock this punch just sails through it no problem! 

Back to making more of a mess of my table! 
I've once again gone back to my trusty memento Potters clay to distress my tags and then stamp over them with the same postmarks stamp from earlier (£3.99) 

For the final pieces! 
My hot air balloon is another of the AMAZING!!! Fab scraps chipboard shapes, we just love these!
In my last project I frantaged them, this time I'm going to show you a different way to use them...
Firstly I painted it white with gesso paint, dried it with a heat gun, then stamped postmarks over the balloon and then stamped the morocco stamp over the basket. 
To give it a little more pizazz I then clear embossed the top of it and tied on a pre cut die cut tag with the same cord for extra journalling 

And that's it for today's project! 
All of these wonderful papers, stamps and chipboard shapes are available from Craftmania
If you're a retail store and would like to stock them please contact Jones Crafts 

Saturday 12 September 2015

Design team project - Fab Scraps!

This month for my jones design team I've got to work with one of the fantatsic new collections from Fab Scrabs! It's a refreshing collection, with a lovely quality feel to it... One of subtle colours and soft lines...

Little bit of a confession here... For some odd reason I do have a little bit of a thing for lighthouses and hot air balloons, so you may notice these appear a little too frequently in my work lol... My class have even picked up on this now.. With the next couple of pages featuring hot air balloons for their lessons they think I'm working in cahoots with the local hot air ballon tours ;) 

Anyways back to today's project... So starting off with my backing sheet of coral and sea themed 

goodies I've distressed around the edge, usually I would use a Tim Holts distress ink but this time I was feeling a little rebellious so opted for a Memento Potters clay pad, although not one to boast it's distressing qualities I find these work just as well as Tim's 

Once I had my base sheet tackled it was time to pick my layering sheet.. Of course it just had to be the lighthouse backing paper, but to fit in with this page I wanted textured edges instead of fresh cut lines, so I used a ruler and ripped along the side if it... No measuring needed... Just rough ripping... I've rebuilt my page to give you a little idea of proportions - 

Now time to distress the edges if these too... Given the nice layered edges I found these really 
distressed well... I am in truth rather a fan of ripped edges... Just seems to fit in so much better with shabby effect I aim for :) 


Or so next up... It's time to lay on my jigsaw puzzle of pieces and work out what's needed next... 

I decided I needed a colour to break up the two heavy background sheets so opted for a light brown linen  card.

I love linnen card as you can highlight the texture so easily by just taking an ink pad and rubbing it right over the top if it, so that's what I did... Once again with Memento Potters clay - cheeky little before and after - 

(This is actually the backing to my photo... That I did the same technique with)

So now I've got my photo backing and layers sort of organised I wanted to find the WOW factor for this page... Now very recently a very lovely friend of the store - Debbie Fisher came to do a Crafters Companion demo day for us and introduced me to Frantage embossing powders and to be honest... 
I'm hooked! So anything I can cover I will... It's an addiction! And with so many colours to choose from I of course had one for this project too ;) 

Now luckily in my design team pack this month I've been very spoilt! 
I've received several of the Fab Scraps chipboard shapes - now these are a true scrapbooking essential!
Acid & lignin free, lightweight, amazing value! 
And the uses are endless as well as the options to colour them! 

To give you a little idea.. Here is a couple of my favourites - 


So now it's time to get my anchor and helm coloured and ready to fit the page, now a wide eyed crafter has possibly already spotted the wonderful frame these shapes come attached to will make a perfect photo surround! (Little cheeky bonus!) 

All we need to do to "Frantage" these pieces is dab over the top of them with a clear emboss pad and the tip on the powder... 


Tap off the excess and heat with a heat gun 
For my frame I've used shabby white and for the small frame, anchor & helm I've used aged gold... 
These powders are only £5.99 and are so thick and wonderful & easy to use.. And it gets even better... They are available in a wide selection if colours too! (In store now @ Craftmania

Now you may be wondering how I've only used one set of these fantatsic chipboard shapes but yet have two of the bonus frames... Well for my next page I'm going to be using the hot air ballon chipboard! So I've borrowed the frame from this one in advance ;) 

Time for the finishing touches! 
I've just added a little cord to my anchor and layered a stamped sentiment 
(kasiercraft stamp set - antique bazaar) 
And a few sprinkles of our fantatsic hanged white frantage powder across the base if the page, and the heated it, hopefully creating a sandy beachy effect! 


Now that's this project done! 
If you would like to come and have a go at this page in one of Craftmania's lessons this page will be 
featuring as a project in our scrapbooking classes in the lowestoft (Suffolk) store on Saturday 1st November 2:00-4:30 and Wednesday 4th November 10:00-12:30 
For more details check out the Craftmania facebook events page -
Www.facebook.com/craftmaniacrafts/events 

As always a massive thank you to Jones crafts for sending me such wonderful products to play with! 
If your interested in stocking any of the products used today please get in contact with jones crafts 
(Frantage embossing powder is not a Jones Crafts product)

All of today's products and pages are available in Craftmnaia Great Yarmouth (Norfolk) & lowestoft (Suffolk) stores - to have any of the products posted to you, please call 01502 218281 :) 


Saturday 8 August 2015

Little One Scrapbook Page - Iris Folding

 
So for today's design team project I've got to work with the little one collection!
And I must admit kids pages are not one that I have much experience with doing... So with trepidation I set sail in to this challenge hoping for a good result... (We've all been there haven't we lol) 

So for today's collection I had this wonderful selection -


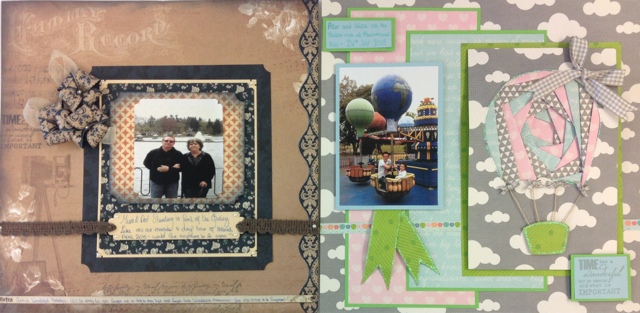
Firstly I decided I would tackle one of my favourite Cardmaking techniques - iris folding... I love this effect but had yet to use it in scrapbooking (one of those ureeka moments you're not sure why you hadn't had it years ago!) so off I set... Google in hand to find a free air balloon pattern -  hey presto...


Being  terrible with technology I did the only thing I know how, and uploaded it in publisher and enlarged it before printing it :) 

If you've never done iris folding this picture probably is making you scratch your head about now.. Trying to make this easy.. You cut strips of paper, fold them in half lengh ways and work around the pattern, starting from number one working upwards.. Until you've completed the shape.. Now for the fun part I haven't mentioned.. Firstly you need to cut this balloon out (just the balloon) and use it as a stencil on the piece of paper you wish to have the balloon on.. In my case a piece of the grey & white cloud paper (Jack). once drawn around, cut out the shape to create an appature. then place this paper face down over the pattern and secure with a little piece of masking tape, so you can now see the picture above through the hole in your paper... Now take the strips you've cut and folded in half and work around the numbers sticking the paper at the top and the bottom with cello tape. 

I didn't find the attached pattern order for the colour strips gave the effect I was after . so I completely
 freestyled the papers I used in my preferred order.

My papers for this design were cut to 3cm wide - depending on how big or small you print the balloon off will determine how wide the strips you'll need :) 


For my folded papers I used - pink hearts (Zoe) - blue words (Noah) and the back of this paper for the grey and white blocks.

I've then used the remainder of the pink heart sheet and the blue words sheet and layered them on green card, for the balloon iris folding I've mounted this with foam tape on to the other side of the great cloud paper (Jack) 

I've also used a little off cut of the Jack paper for my basket, and the tabs coming out from under my knot, the photo is just layered on matching card, which I've also used for my stamped sentiment and journalling (then matted in the matching green card) 

To finish off this page I have added the worlds smallest handmade bows (ok maybe not.. But they felt like it when I was trying to make them! Lol) to the joins of my cord to the ballon and used the same design ribbon for a large bow on the top of the balloon. 

The only piece I've forgot to mention is the strip of hot air balloons, this is the base strip off of the Jack page! 

For a little added sparkle (and to hide my wonky cutting line!) 
I've gone around the balloon, basket and tabs with iridescent glitter glue

I hope this all makes sense, any questions, please don't hesitate to ask away in the comments :) 


If you would like to come and do this as a lesson, we will be doing these 2 pages 
At Craftmania lowestoft on 
Saturday 19th September 2:00-4:30 &
Wednesday 23rd September 10:00-12:30
This lesson costs £8 and everything you need to make both pages is supplied for you, all you need to bring is yourself and some pictures :) 
To book please give us a call on - 01502 218281 - (mon-sat 9-5)

Alternatively all of these papers will be available from Craftmania, or if you wish to stock these products in your store, please get in contact with Jones Crafts - wholesaler of many fantastic brands including Kaisercraft, Bobunny, Marion smith, pioneer, candy box crafts, impression obsession and just announced - fabscraps! 

Thursday 6 August 2015

-Special One Off Lesson-


- SPECIAL ONE OFF LESSON! -

I've been using our brand new paper collection to decorate our plain cardboard books (£3.99)

In this lesson you will be allowed to choose 4 - 12x12" designs from 1000's we stock! (If you wish you are more than welcome to use the same papers as I did, they are rather scrumptious!)

This lesson will be taking part at our Lowestoft store on Saturday 12th September 
2:00 - onwards 
(estimated 2hours)

This lesson is £10 and everything you need is included for you

To book please call 01502 218281 during store hours smile emoticon

Sunday 2 August 2015

Little One - Design Team Project July

For today's project I've decided to approach it from a very different angle, so often we spend hours creating pages.... But sometimes time isn't so on our side... So I introduce the 10 minute page! It's simple but hopefully you'll feel it's an effective page with a little bit of the wow factor... 

For this project I have been using the new collection from Kaisercraft - 
It's a great selection of papers and stickers for both boys & girls! 


So to create to my simple page... I have taken two of the "Ruby" pages, using one as my background and cutting 3" off the left side of the other one, using a Hougie board I have then scored the end from the bottom of the sheet up at 4cm -9.5cm 

I've then folded these lines back and forth to create a pocket and a hanging over flap, placing foam tape down both edges of the pocket and along the underneath of the top flap, before sealing I have added a width of pink satin ribbon across my pocket and then glued all in place, and attached with double sided tape to my page.. 

Now for the very speedy decoration of it I have used one of the unsung heros of kasiercraft scrapbooking... A sticker sheet! 
As you can see, these beauties are filled full of everything you need for a quick simple page but can equally be dressed up for more challenging projects.... 

I've only used a third of my sheet for this page, all obviously being sticky back it only takes seconds to select and attach your required designs. 

As for my photos, I've just mounted these on to shades of pink card and layered them in my pocket, you could of course add more or less photos, even adding in birth certificates and other momentos if you prefer.

I hope you like this simple little project, I promise it won't be long until I upload my project from this collection... 


Monday 20 July 2015

Design team project - Bo Bunny - Juliet

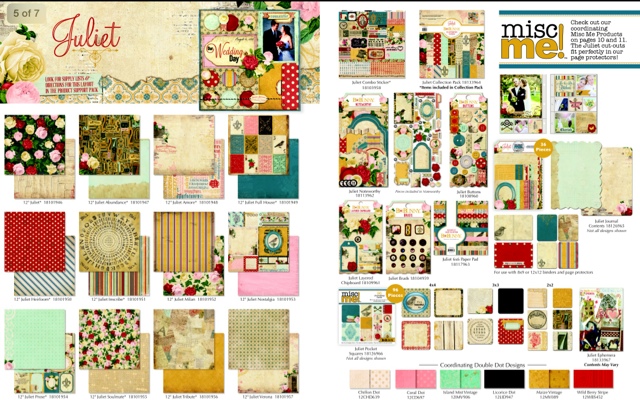
Today's project is a nice easy project, using the wonderful new collection from Bo Bunny - Juliet

Such a wonderful selection of papers & embellishments...

For this page I've used Juliet - Tribute & Verona 

Starting with the Verona page I have cut it down to a 29cm square, then using my ruler & knife I have cut a 1.5cm frame around the two sides to create an opening, to then fold back the piece cut to reveal the flower & door part from the back of the page, 

I've then mounted with foam pads on to the Juliet tribute page. 

It creates a lovely large pocket, perfect for trinkets, certificates, pictures & more!

Next up I've used a Juliet Abundance sheet. Cutting this down to a 22cm square to layer in the middle of the opening, the excess you've cut off of this sheet gave me the numbers for the top of my page, before adding these I have used the bar I cut off the Juliet Verona page to go across the page on foam pads. 

To keep this page a quick and easy project I have layered my photos and journalling on gold & navy card and layered navy & gold ribbon with a tassel attached to the edge of the page. 

Finally I've added a few pearls and hey presto a nice easy page done! 

If you would like to come and join us at Craftmania Lowestoft to do this as a lesson, have a little look in the events section on the Craftmania Facebook page for details - www.facebook.com/Craftamaniacrafts

If like me you've fell in love with these fantastic Bo Bunny collections you can get your hands on them at Craftmania, if you're a retail enterprise and wish to stock these gorgeous products then look no further than Jones Crafts 


Friday 26 June 2015

Design team project - June

So this month I've jumped ship from The fantastic Kaiser collections and have been set the task of using some of the latest collections from Bo Bunny (NOW being stocked by Jones craft - wholesalers & in store @ Craftmania) 

For today's project I've used the lovely floral Juliet collection and focused on using 3 sheets -
Juliet - for the grey floral sheet
Juliet Milan - for the yellow floral sheet
Juliet nostalgia - for all of my cut out embellishments 


In this scrapbook page I really wanted to show how you could interlock two sheets of the same design in two colours, so starting with Milan page as my base I then took the Juliet grey sheet, and with a ruler riped along the edge in a slightly diagonial direction from the top right corner back in towards the page, all the way down the 12x12, I then did the same with the top left corner giving me two panels to foam pad on top of my yellow page.

I liked the way the design matched up with only the backing colouring changing... From here I cut out several of the flowers from my grey sheet that I'm left with (the middle of the grey part).

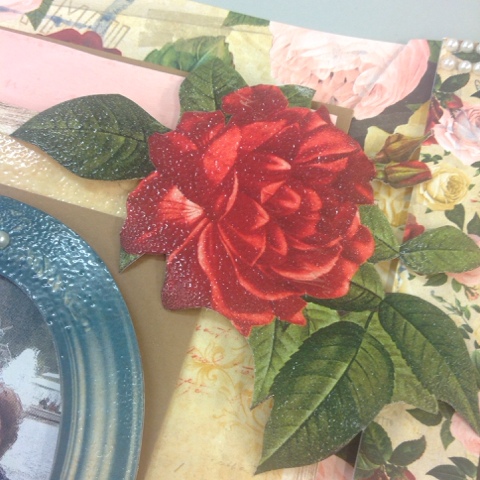
Now I have my flowers cut.. I really wanted them to stand out a little so I decided to make more of a feature of them by heat embossing over them in clear embossing powder using a clear emboss pad... I really liked how this gave the flowers a wet look... I then popped these to one side...

Next up I picked my two green ribbons under my grey top corner leaving them hanging free for the tags that I would shortly cut out...

Drawing your attention now to the fantatsic nostalga sheet in this collection... 

I nearly used every piece of this sheet! I firstly cut out the yellow large box on the left of the peg so I could use the pink side of this as the backing for the next panel, but then decided I really liked the frame and bird, so using a knife I removed these, leaving the sheet in tact... So I could use this still as my backing (covering up the holes with the next layer.... These sheets do cost a few pennies and it's always such a shame to use them for backings leaving elements like this hidden, even if you don't use them on this project, hook them out and keep them safe for the next! 

After removing this panel from the nostalga sheet I then removed the large panel beside it, and heat embossed this the same way as my flowers, aswell as the oval frame we cut from the last panel.

Then using one sheet of linnen brown card I layered my design adding in other elements from the nostalga sheet. 

This page ended up much busier than I imagined, but I really liked this... It was lovely to tackle a different style and theme! And was well chuffed with how the embossed glazed look ended up... Many brands charge a high premuim for embossed elements on pages, within a few seconds you could do your own ;) 

If you would like to come and do this page with me... We will be doing this as a lesson at Craftmania Lowestoft on Saturday 25th July -2:00-4:30 (we will also be tackling another page in this lesson as well) - this lesson costs £8 and everything except your photos is provided for you :) 

This fantatsic collection and many more Bo Bunny collections are available from to retail customers from Craftmania and for trade customers from Jones Crafts. 

Thursday 18 June 2015

New Lessons at Craftamania Great Yarmouth!

I'm so pleased to announce Craftmania have just launched a complete list of lessons at the New Great Yarmouth store, I can't wait to be able to teach at this store too! Lessons kick off July 6th.
Bookings are being taken from 10am Friday 19th June.
To see all the fantatsic lessons they have coming up, please look at the events section in the Craftmania facebook page - www.facebook.com/craftmaniacrafts

Crochet - scrapbooking - Cardmaking & yarn club

Thursday 21 May 2015

Craftmania lessons

If you would like to learn some if the techniques I feature on my blog, as well as many more! Why not attend a Craftmania lesson!
We do Cardmaking, scrapbooking & crochet lessons at our Lowestoft store,
(starting soon in Yarmouth as well!)
For all the latest projects and dates please check out the events section of our facebook page -
https://www.facebook.com/CraftmaniaCrafts/events?ref=page_internal

Here is a couple of my favourite upcoming lessons -
Scrapbooking lesson £8 - Saturday 27th June 2:00-4:30
Wednesday 1st July 10:00-12:30 


Cardmaking lesson £8 - Tuesday 9th June 6:30-9:00
Wednesday 10th June 2:00-4:30
Saturday 13th June 10:00-12:30


Cardmaking lesson £8 - Tuesday 26th May 6:30-9:00
Wednesday 27th May 2:00-4:30
Saturday May 30th 10:00-12:30


Photo display £15 Saturday 20th June 2:00 - estimated 

For more details, please do check out our facebook page. 
To book our lessons - please call 01502 218281 

Sunday 17 May 2015

Jones Craft Design team Month 2 Project - 4

This month I'm working with the NEW Scrap Yard collection from Kaisercraft on behalf of Jones Crafts. As you may have seen last week I used the papers to cover and decorate a pen carry pot... Well for my next project I thought I would use these for a little scrapbooking! This set is just so versatile!


Recently we went for long weekend to the second largest theme park in Europe - Efteling - currently under construction Is this monster of a new ride - Baron 1898 - and luckily for me the colours of this new coaster matched this wonderful Scrap Yard collection perfectly! 

So to build my page I chose 3 pages from the collection, picked the blue prints style design as my backing and then chose the grey mesh one as layer two - I simply cut 1" off of the top and one side to create my mat then did the same with my next page (script) but upped the removal to 2" - and layered them flat - in the centre. 

Next up I cut mats for both my photos (1 Centura pearl gold - 1 linen terracotta) using black memento and the tic toc clock texture stamp I stamped all over the mats, then attached my photos, and foam padded them on to my page, leaving spaces to pop my cogs under once they were ready. 

On to the cogs and swirls! - and a very stolen technique! I see this and just had to try it! And LOVED IT! 
Using 2 of our new sets of dies - cogs £29.99 (3dies) and swirls £29.99 (2 dies) I cut all of them out of terracotta linen card - then using a black memento pad I stamped all over the top of the cuts - 

For the next stage you take a clear emboss pigment pad and stamp all over the cuts. 

Then take tiny pinches of gold -silver - copper embossing powders and sprinkle them over the cuts randomly -


Tap away the loose bits and pop a clean sheet under your cuts - saving the mixed excess of the metallic mixes for another project ;) 
Now tip clear embossing powder all over the cuts and then heat emboss the lot! 
The metallic powders and the clear will all melt in together to give you a rust effect... And the terracotta and black mixed base coat certainly helps too! 

This one is embossed! And done - the right side just needs to be gone over with the heat gun. 

Now all of your cogs and swirls look a little rusty, you can now foam pad and glue in your swirls and cogs! 

For our next stage we will find the barcode strips we've cut off the 12x12's at the start - I've then trimmed down the black one (you never know when you're making a memory) and foam padded it over my photos. I've then taken the black screw in heads on the silver strip and cut it in to pieces and posted it under my photos, to give the effect the strip goes all the way through.. But this way you get more out of 1 strip ;) 

I've then used 3 journalling pieces from the scrap yard embellishments pack and popped these on the page. Last up I used the circles from the inside of the cogs to foam pad in the corners of the page and the the corners if the photos. 

And that's it! One page completed :) the only thing I haven't explained is the Baron 1898 in the bottom right corner, this is actually a photo of the poster taken off the construction fence surrounding the coaster, and then cut I out instead of leaving it as a full photo - I was rather chuffed with how this looked :) 

As always all you need for this project us available through Craftmania - Great Yarmouth & Lowestoft 

If you're a trade customer looking to stock these products - dies - pages - embellishments - they are all available from Jones Crafts